Did you know that product photos can make or break your online sales? High-quality visuals are essential for attracting potential customers and making a memorable first impression. In fact, research shows that 93% of consumers’ buying decisions are influenced by visual appearance. With advancements in smartphone technology, you don’t need an expensive camera setup to capture stunning product photos. Smartphones today have sophisticated cameras that can produce professional-looking images. For small businesses, using a phone for product photography is a cost-effective solution that doesn’t compromise quality.
This comprehensive guide will walk you through actionable steps to improve your product photos using your phone. We’ll cover essential tips on lighting, angles, and backgrounds, helping you create high-quality images that enhance your brand’s appeal and drive sales.
Lighting Tips for Better Product Photos
Lighting is one of the most crucial aspects of photography. Proper lighting can enhance the details and colors of your product, making it look more attractive. Natural light is the most favorable because it provides a soft, even illumination that reduces the need for extensive post-processing. Aim to take photos during the day and position your setup near a window with diffused sunlight. Avoid harsh midday sunlight as it can create strong shadows and overexposed highlights.
If you’re working indoors or during low light conditions, you can use desk lamps or LED lights. Position your light sources at an angle that reduces direct exposure to the product. Use simple diffusers, such as white sheets, shower curtains, or even a piece of white paper, to soften the light and minimize harsh shadows. If you have multiple light sources, position them on opposite sides of the product to ensure even lighting from all angles.
To achieve the best results, place your product in a spot where natural light flows gently. Use a plain, light-colored background to reflect light and keep your product evenly lit. Avoid direct light on the product; instead, use diffusers to create a soft, flattering illumination. Experiment with different lighting setups to find what best showcases your product’s features, and consider using reflectors or bounce cards to fill in any shadows and enhance the image’s overall quality.
Finding the Best Angles for Product Photos
The angle you choose to photograph your product from can significantly impact its presentation. Selecting the best angle helps in showcasing the product’s features and can influence a customer’s buying decision. For a well-rounded view, start with the most straightforward angles—eye level or straight-on shots—which provide a clear and realistic representation. Then, experiment with alternative angles to highlight different aspects of the product, such as its texture, shape, or functionality.
Basic Angles: Essential angles include:
- Front View: Provides a direct look at the product’s main features.
- Side View: Useful for showcasing the product’s depth and additional details.
- Top-Down View: Ideal for products with intricate designs or patterns, as it gives a comprehensive look at the entire surface.
- 45-Degree Angle: Offers a dynamic perspective that highlights both the front and sides of the product, creating visual interest. Experiment with these angles to find what best highlights your product’s strengths.
Best Practices: Ensure the product is positioned correctly and the camera is level to avoid distortion. Use a tripod or stable surface to keep the camera steady and prevent blurriness. Avoid shooting from angles that could skew the product’s proportions or features. Consider using a consistent angle for all product shots to maintain a cohesive look across your images. Review each photo and select the angles that best represent your product and align with your brand’s visual style.
Using Natural Light for Product Photography
Utilizing natural light for product photography offers a soft and flattering illumination that enhances the product’s features without needing additional lighting equipment. It creates a natural look that can make the product appear more authentic and appealing to potential customers. Natural light minimizes harsh shadows and bright spots that can distort the product’s appearance, providing an even and gentle lighting effect that showcases the product’s true colors and details.
Best Times to Shoot:
The ideal times to capture product photos using natural light are during the golden hours—just after sunrise and just before sunset. During these periods, the sunlight is diffused, creating a warm and even tone that is aesthetically pleasing. The light is softer and less direct, which reduces the risk of strong shadows or glaring highlights. Avoid shooting in the middle of the day when the sun is directly overhead, as this can result in harsh, unflattering light and deep shadows.
Setup Tips:
To make the most of natural light, set up your product near a large window to let in plenty of daylight. If the sunlight is too strong, place a white curtain or use a diffusion panel to soften and diffuse the light. For outdoor shooting, select a shaded area to avoid direct sunlight, which can be too harsh. Additionally, consider using a reflector to bounce light back onto the product, which helps fill in shadows and creates a more balanced illumination. Ensure the product is well-positioned to receive the best light, and make adjustments as needed to achieve an even and flattering result.
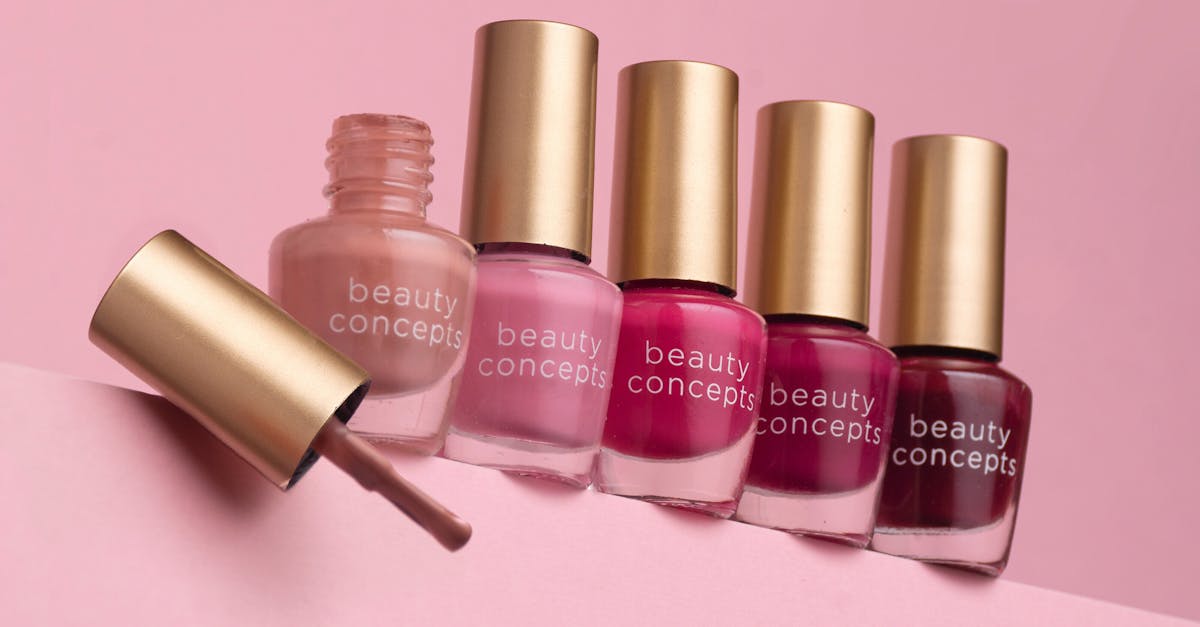
Choosing the Right Background for Product Photos
Utilizing a clean and simple background is crucial for effective product photography as it allows the product to be the focal point of the image. An uncluttered background eliminates visual distractions and ensures that the product’s features are prominently highlighted, enhancing the overall professionalism of the photo. A busy or complicated background can detract from the product, making the image look less polished and less appealing to potential customers. A well-chosen background that complements the product helps to maintain a cohesive and aesthetically pleasing look that draws attention directly to the item being showcased.
Types of Backgrounds:
Neutral backgrounds like white, light grey, or beige are ideal for product photography as they offer a clean and unobtrusive backdrop that emphasizes the product. These colors provide a classic and professional look that ensures the product stands out without any distractions. For a more dynamic approach, select a background that complements the product’s color palette or creates a harmonious contrast. Avoid overly bright or patterned backgrounds that might overshadow the product. Textured backgrounds, such as wooden surfaces or marble countertops, can add a touch of elegance and context, but ensure they are not too busy or distracting.
DIY Backgrounds:
To create a suitable background at home, use materials like poster board, fabric, or a tablecloth. Poster board is a cost-effective option that provides a smooth and solid color background, ideal for a clean look. Fabric, such as a white sheet or a soft-colored cloth, can create a more nuanced and soft appearance, but make sure it is wrinkle-free and evenly stretched. Ensure that the background covers the entire area around the product to prevent any unwanted elements from appearing in the photo. Proper lighting and setup are crucial to maintain an even and consistent look across the background, avoiding shadows or inconsistencies that could detract from the overall image quality.
Lighting Tips for Better Product Photos
Leveraging natural light is highly effective for product photography as it provides a broad, even illumination that enhances the product’s colors and textures. Place your product near a large window where soft, diffused natural light can gently light it. Avoid placing the product in direct sunlight, which can create harsh and unflattering shadows or bright spots. On overcast days, the clouds act as a natural diffuser, softening the sunlight and creating a uniform light that minimizes shadows. Monitor the light’s direction and intensity throughout the day to maintain consistent lighting conditions for all your product photos.
Artificial Lighting:
In the absence of sufficient natural light, artificial lighting can be a reliable alternative. Use softbox lights or LED panels with diffusers to create a soft and evenly distributed light that mimics natural light. Position these lights at a 45-degree angle to the product to achieve a balanced illumination and reduce the appearance of deep shadows. Ensure that the lights are equipped with diffusers to scatter the light and avoid creating harsh reflections or intense highlights. Experiment with the distance of the lights from the product and their angle to fine-tune the lighting effect and achieve the most flattering look.
Lighting Setup:
A well-thought-out lighting setup is essential for producing high-quality product photos. Begin by arranging your lights in various positions around the product, testing how each arrangement affects shadows and highlights. Use a white sheet, reflector, or diffuser to soften and spread the light more evenly, minimizing the appearance of harsh shadows. Check the product from multiple angles to ensure that the lighting is consistent and flattering. Make adjustments as needed to correct any unwanted reflections or uneven lighting, ensuring that the final photos showcase the product effectively and attractively.
Backgrounds and Props for Product Photos
The choice of background is essential for creating a professional and appealing product image. Opt for backgrounds that are minimalistic and do not distract from the product. Neutral colors such as white, light gray, or beige are commonly used because they create a clean, uncluttered appearance that makes the product the focal point. If your product has a specific color, select a background that provides a subtle contrast without clashing with the product. For instance, a light-colored product may stand out better against a darker background and vice versa. Avoid backgrounds with intricate patterns, bright colors, or textures that can compete with or obscure the product.
Using Props:
Props can enhance the visual appeal of your product by adding context and creating a relatable setting. Choose props that are relevant to the product and its use, ensuring they complement rather than overshadow the product. For example, when photographing skincare products, use props like clean towels or natural elements such as leaves to emphasize freshness and quality. Ensure that props are placed strategically so they enhance the product’s features and tell a story without creating visual clutter. Avoid using too many props, as they can divert attention away from the product itself.
Background Setup:
Achieving a flawless background setup is crucial for maintaining a professional appearance in your product photos. Use a dedicated backdrop or a large, smooth surface to ensure the background is free from any imperfections. Make sure the background is evenly lit to prevent shadows or bright spots that could distract from the product. If using a backdrop, ensure it is stretched taut and free from wrinkles or folds. Regularly check and adjust the lighting and positioning to maintain consistency across all your product images. A well-prepared background contributes significantly to the overall quality of the photos and helps present your product in the best light.
Editing Your Product Photos
Begin with adjusting brightness and contrast to enhance the overall quality of your photo. Brightness adjustments help in managing the lightness or darkness of the image, ensuring that the product is well-lit and visible. Contrast adjustments are important for making the product’s features stand out by highlighting the differences between light and dark areas. Use the sharpness tool to increase clarity and define details. Be cautious not to over-sharpen, as it can create unwanted noise or artifacts. Aim for a balance that highlights your product’s details without distorting the image.
Cropping and Straightening:
Cropping should be done thoughtfully to eliminate any background clutter or unnecessary space around the product. Focus on framing the product well, ensuring it is the central element of the image. Straightening is equally important; use gridlines or rulers in your editing software to align the product properly. Ensure the product is centered and aligned, preventing any skewed or tilted appearance. This step enhances the visual appeal and maintains a professional and polished look.
Color Correction:
Accurate color representation is crucial for product photography, especially for online sales. Use color correction tools to adjust color balance, saturation, and hue to match the product’s real-life colors. Pay attention to white balance to ensure the photo reflects true colors without any color cast. Adjusting saturation can help in making the colors more vibrant, but be careful not to exaggerate. This ensures that the photo provides a realistic view of the product, helping to build trust with customers and avoid returns due to color discrepancies.
You Might Also Like:
- 5 Essential Tips for Small Businesses to Nail Product Photography in London, Ontario
- How to Use Visuals to Enhance Your Brand
- Social Media Marketing for Small Businesses
- Mastering Content Calendars: A Guide for Small Businesses
- Small Business Photography Hacks: Create Stunning Product Images on a Budget